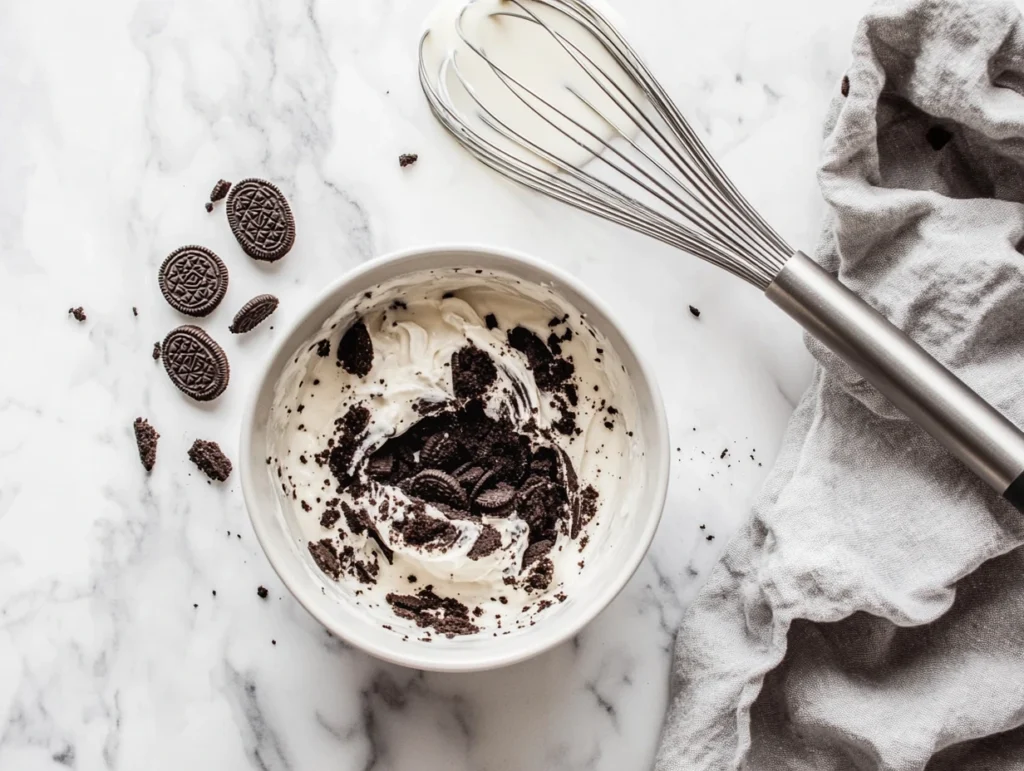
Craving something sweet and indulgent but short on time? The Oreo Mug Cake is your perfect go-to dessert! This delightful, single-serving cake is made with just a few ingredients and takes only a minute to cook in the microwave. Whether you’re satisfying a late-night craving or surprising someone with a quick treat, this recipe is foolproof, customizable, and oh-so-delicious. Let’s dive into the magic of whipping up an Oreo Mug Cake in no time!
Easy and Delicious Oreo Mug Cake Recipe
What is an Oreo Mug Cake?
An Oreo Mug Cake is a microwave dessert crafted from crushed Oreos and a few basic ingredients. It’s moist, chocolatey, and has that irresistible Oreo flavor we all love. The best part? It comes together in less than five minutes, from mixing to eating!
Why You’ll Love This Recipe
This Oreo Mug Cake recipe is more than just quick and easy. It’s a versatile dessert that can be made with minimal effort and adjusted to suit your taste. Whether you prefer it extra chocolaty or topped with whipped cream and sprinkles, the possibilities are endless. Plus, there’s no need to preheat an oven or wash a ton of dishes afterward.
Ingredients Needed for an Oreo Mug Cake
Main Ingredients: Oreos and Milk
To make this delectable Oreo Mug Cake, all you need are crushed Oreos and milk as your base. The Oreos provide that signature chocolatey flavor, while the milk binds everything together into a smooth batter.
Optional Toppings and Mix-ins
Elevate your cake with toppings like whipped cream, chocolate chips, or even a scoop of ice cream. Feeling adventurous? Try stirring in a spoonful of peanut butter or a dash of vanilla extract for an extra flavor punch.
Ingredients
- 4 Oreo cookies – Crushed into fine crumbs.
- 3 tablespoons milk – Any type of milk works; dairy or plant-based.
- 1/8 teaspoon baking powder – Optional, for a slightly fluffier cake.
- 1 tablespoon sugar – Optional, for additional sweetness.
- 1 teaspoon chocolate chips or sprinkles – Optional, for a fun topping.
- Whipped cream or ice cream – Optional, for serving.
Step-by-Step Instructions
- Prepare the Mug
Choose a microwave-safe mug with a capacity of at least 12 ounces to avoid overflow. Lightly grease the mug with oil or butter if desired. - Crush the Oreos
Place the Oreos in a small zip-top bag and crush them using a rolling pin until they turn into fine crumbs. Alternatively, use a food processor or crush them directly in the mug with a fork. - Mix the Batter
Add the crushed Oreos to the mug. Pour in the milk and mix thoroughly until it forms a smooth, lump-free batter. If you’re using baking powder or sugar, stir them in at this stage. - Microwave the Mug Cake
Place the mug in the microwave and cook on high power for 60 seconds. Check the texture; if the center is still wet, microwave for an additional 10 seconds at a time. - Let It Rest
Once cooked, let the mug cake rest for 30 seconds to allow the heat to distribute evenly and prevent it from being too hot to eat. - Add Toppings and Serve
Top your Oreo Mug Cake with whipped cream, chocolate chips, or a scoop of ice cream for extra indulgence. Enjoy immediately!
Nutritional Information (per 100g)
| Nutrient | Amount |
|---|---|
| Calories | 180 kcal |
| Protein | 3 g |
| Carbohydrates | 30 g |
| Sugars | 18 g |
| Fat | 7 g |
| Saturated Fat | 2 g |
| Fiber | 1 g |
| Sodium | 150 mg |
This table provides a clear, concise view of the nutritional content, making it easy for readers to understand the calorie and nutrient breakdown of the Oreo Mug Cake.
Helpful Tools
Having the right tools can make preparing an Oreo Mug Cake even easier. Here’s a list of simple, everyday items that you might need:
- Microwave-Safe Mug: Choose a mug with a capacity of at least 12 ounces to prevent overflow.
- Fork or Whisk: For mixing the batter until smooth.
- Zip-Top Bag or Food Processor: To crush the Oreos into fine crumbs. A rolling pin can also help when using a bag.
- Measuring Spoons: Ensure accurate measurements for the ingredients, especially milk and baking powder.
- Spoon or Rubber Spatula: For scraping the sides of the mug to ensure even mixing.
These tools are likely already in your kitchen, making the process hassle-free and enjoyable!
Tips and Tricks for the Best Oreo Mug Cake
Choosing the Right Mug
Picking the right mug is crucial for a perfect Oreo Mug Cake. Use a microwave-safe mug with a wide opening to ensure the cake cooks evenly. A larger mug helps prevent the batter from overflowing during cooking.
Microwave Settings to Use
Microwave wattages can vary, so adjust the cooking time accordingly. Start with 60 seconds on high power, then check the cake’s texture. If it looks undercooked, heat it in 10-second intervals. Be careful not to overcook, as this can make the cake dry and rubbery.
Preventing Overcooking
Microwave desserts can go from perfectly fluffy to overcooked in seconds. To avoid this, stop cooking as soon as the center is set but still slightly soft. The residual heat will finish the cooking process, leaving your cake moist and tender.

Variations to Try
Vegan Oreo Mug Cake
Yes, you can make a vegan-friendly version of this dessert! Use plant-based milk like almond or oat milk. Since Oreos are already dairy-free, no other changes are needed.
Adding Chocolate Chips or Peanut Butter
For extra decadence, stir in some chocolate chips or drizzle peanut butter on top before microwaving. These small additions take your Oreo Mug Cake to a whole new level of indulgence.
Serving and Storing Your Oreo Mug Cake
Creative Topping Ideas
An Oreo Mug Cake is delightful on its own, but adding toppings can make it even more indulgent. Try these:
- Whipped Cream: A classic choice that adds lightness and creaminess.
- Ice Cream: A scoop of vanilla or chocolate ice cream melts perfectly into the warm cake.
- Drizzles: Chocolate syrup, caramel, or a sprinkle of powdered sugar elevate the flavors.
- Crunchy Additions: Top with crushed Oreos, sprinkles, or chopped nuts for added texture.
Storage Tips for Leftovers
Although an Oreo Mug Cake is designed to be single-serving, you can save leftovers for later. Cover the mug with plastic wrap or transfer the cake to an airtight container.
Reheating Your Mug Cake
To enjoy your leftover cake, reheat it in the microwave for about 10 seconds. Avoid overheating, as this can make the cake lose its soft texture.
How Long It Can Be Kept
Ideally, the mug cake should be eaten fresh for the best taste and texture. However, if stored properly, it can last up to 24 hours in the refrigerator.
Frequently Asked Questions About Oreo Mug Cakes
How to make an Oreo cake in a cup video?
Making an Oreo Mug Cake in a cup is incredibly simple, and video tutorials can make it even easier! Search for “Oreo Mug Cake Recipe” on YouTube or social media platforms like Instagram. These videos typically show how to crush Oreos, mix with milk, and microwave the batter in under two minutes.
How do you microwave Oreos?
Microwaving Oreos is the first step in creating a soft, gooey batter for your Oreo Mug Cake. Crush the Oreos in a microwave-safe mug, add milk, and stir until smooth. Microwave the mixture for about 60 seconds on high power. This process melts the Oreos and transforms them into a fluffy cake texture.
Why do my mug cakes never work?
Mug cakes can fail for several reasons:
- Overcooking makes them dry. Always microwave in short intervals and check for doneness.
- Uneven mixing can leave dry pockets in the batter, so stir thoroughly.
- The wrong mug size can cause overflow or uneven cooking. Use a microwave-safe mug with enough room for the batter to rise.
What are Birthday Cake Oreos?
Birthday Cake Oreos are a special flavor of Oreo cookies that have a vanilla-flavored creme filling mixed with colorful sprinkles. They taste like classic birthday cake and are a fun twist for desserts like an Oreo Mug Cake. Swapping regular Oreos for Birthday Cake Oreos adds an extra festive flavor to your mug cake.
Can I Use Different Types of Oreos?
Absolutely! This Oreo Mug Cake recipe works with various Oreo flavors, like Golden Oreos, Mint Oreos, or Double Stuf. Each variation gives the cake a unique twist while keeping that classic Oreo charm.
Can This Recipe Be Made Vegan or Dairy-Free?
Yes, it’s simple to adapt this recipe for vegans or those avoiding dairy. Substitute regular milk with almond, soy, or oat milk. Since Oreos are naturally dairy-free, no further adjustments are needed!
What if I Don’t Have Baking Powder?
Baking powder helps the cake rise slightly, but you can make the recipe without it. The texture will be a bit denser but still delicious. Alternatively, a pinch of baking soda with a splash of vinegar works as a substitute.
How to Perfect Your Oreo Mug Cake Every Time
Mix Thoroughly for an Even Texture
To achieve the perfect Oreo Mug Cake, ensure the batter is mixed evenly. Crush the Oreos thoroughly into fine crumbs, and blend them well with the milk to avoid any dry pockets or lumps in your cake.
Choose the Right Mug Size
A larger mug (12 to 16 ounces) is ideal for preventing overflow and ensuring the batter has enough room to rise as it cooks. If your mug is too small, you risk a messy microwave!
Adjust for Microwave Power
Not all microwaves are created equal. If yours has a higher wattage, reduce the cooking time slightly to avoid overcooking. On the other hand, if your microwave is on the lower end of the power spectrum, you may need a few extra seconds.
Let It Rest After Cooking
Once your mug cake is done, allow it to sit for about 30 seconds before digging in. This resting time helps the texture settle and ensures the cake isn’t too hot to enjoy.
Have You Made This Recipe?
We’d love to know how your Oreo Mug Cake turned out! Did you try any fun variations, like adding chocolate chips or a drizzle of caramel? Share your thoughts, tips, or even pictures in the comments section below. Your feedback helps us improve and inspires others to try the recipe too!
Easy Oreo Mug Cake Recipe (Quick & Delicious!)

Ingredients
- 4 Oreo cookies – Crushed into fine crumbs.
- 3 tablespoons milk – Any type (dairy or plant-based).
- 1/8 teaspoon baking powder – Optional for fluffiness.
- 1 teaspoon chocolate chips – Optional for extra indulgence.
- Whipped cream or sprinkles – Optional for topping.
Instructions
- Prepare the Mug
Use a microwave-safe mug (12 oz or larger). Grease lightly with oil or butter if desired. - Crush Oreos
Crush Oreos in a zip-top bag with a rolling pin or use a food processor until fine crumbs form. - Mix Batter
Add Oreo crumbs to the mug. Pour in the milk and mix until smooth. If using baking powder or chocolate chips, stir them in now. - Microwave
Microwave the mug on high power for 60 seconds. Check doneness. If undercooked, microwave in 10-second intervals until set. - Cool and Serve
Let the mug cake rest for 30 seconds to cool. Add toppings like whipped cream, ice cream, or crushed Oreos and enjoy immediately!
Notes
- Texture Tip: Don’t overcook; the cake continues to cook slightly after microwaving.
- Substitutions: Use plant-based milk for a vegan option.
- Serving Size: This recipe is ideal for one serving; adjust quantities for more.

