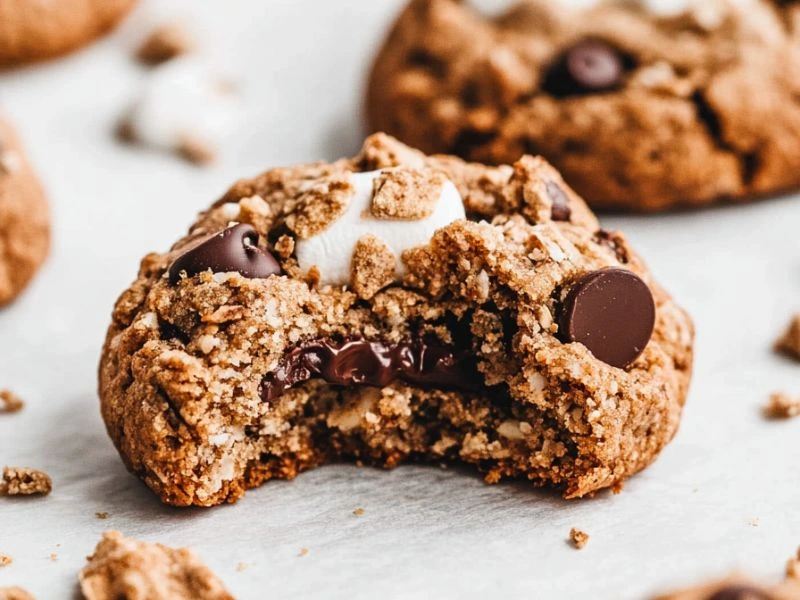
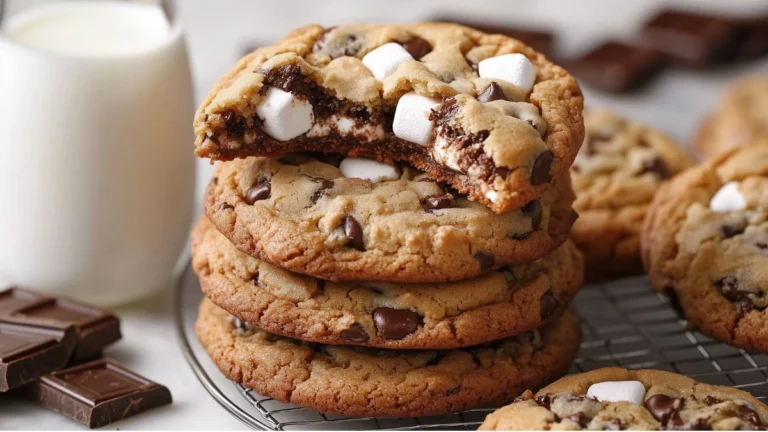
Who doesn’t love the gooey, sweet goodness of a classic s’more? Now, imagine all that delightful flavor—marshmallows, melted chocolate, and crisp graham crackers—reimagined as cookies! That’s the magic of cookie s’mores. By combining the nostalgia of campfire treats with the convenience of cookies, this recipe creates a dessert that’s both familiar and fresh.
What’s even better is how versatile these treats are. Whether you’re planning a cozy family night, baking for a party, or simply indulging a late-night craving, cookie s’mores fit the bill perfectly. Plus, since they’re made entirely in your kitchen, you can skip the campfire while still enjoying all those toasty, chocolatey flavors.
From the golden, toasted marshmallows to the rich layers of melted chocolate, every bite feels like a mini celebration. And let’s be honest—who doesn’t want a dessert that’s this easy to make and share? So, roll up your sleeves, grab your ingredients, and let’s dive into the world of cookie s’mores, where simplicity meets unforgettable flavor.
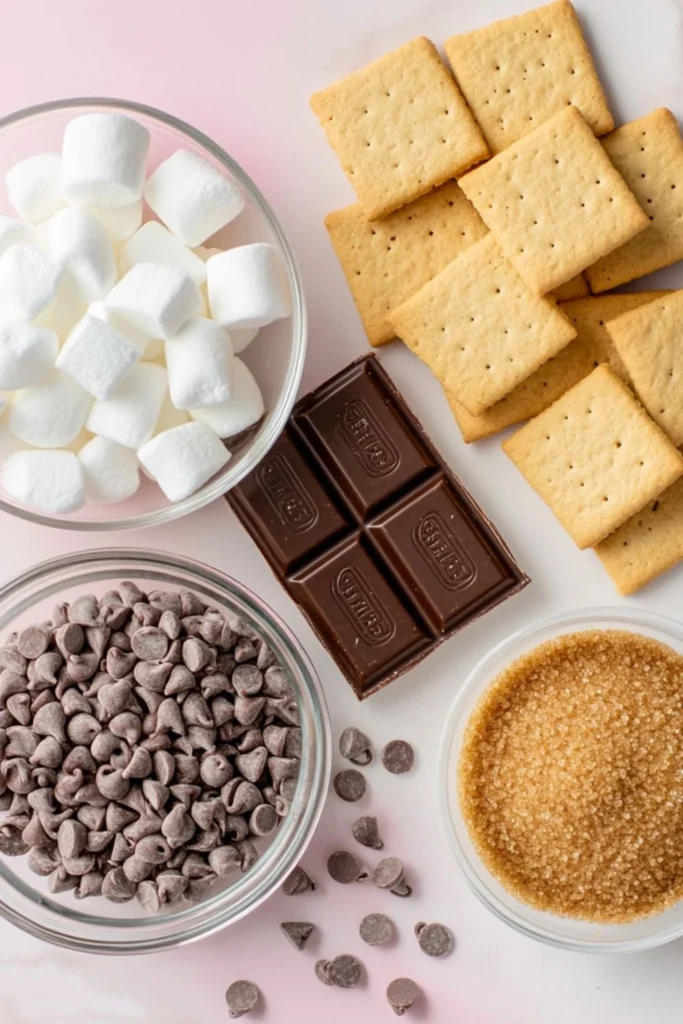
Cookie S’mores Ingredients
Making cookie s’mores is as much about creativity as it is about flavor. With just a few key ingredients, you can whip up a dessert that’s both simple and indulgent. Let’s break down the essential components that make these treats unforgettable, along with some tips to customize them to your liking.
Cookies as the Base
When it comes to cookie s’mores, the choice of base is crucial—it sets the stage for all the gooey goodness that follows. Graham crackers are the traditional option, offering a crisp texture and a slightly sweet flavor that complements the marshmallows and chocolate. However, why stop there? Chocolate chip cookies add an extra layer of decadence, while sugar cookies provide a soft, buttery base.
If you’re short on time, store-bought cookies work perfectly and make the process even quicker. For a more personalized touch, consider baking your own cookies from scratch. Homemade cookies allow you to control the size, flavor, and texture, giving you endless possibilities to customize your cookie s’mores.
Marshmallows for Gooey Texture
The marshmallow is what makes s’mores, well, s’mores! Mini marshmallows are perfect for layering evenly, while jumbo marshmallows bring that classic, over-the-top gooeyness. Whichever size you choose, the key is to toast them to perfection.
To achieve that golden-brown exterior with a soft, melty center, you can use a broiler, a kitchen torch, or even your stovetop. Keep an eye on them, as marshmallows toast quickly and can go from beautifully browned to burnt in seconds. This step adds not just texture but also a slightly smoky flavor that ties the whole dessert together.
Chocolate for Melty Goodness
Chocolate is the heart of cookie s’mores. For the best results, choose chocolate that melts easily. Bars of semi-sweet or milk chocolate are classic choices, but chocolate chips work just as well. If you’re feeling adventurous, try white chocolate or dark chocolate for a twist.
To ensure even melting, layer the chocolate directly on the cookie base before adding the marshmallows. The residual heat from toasting the marshmallows will help the chocolate soften perfectly, creating that luscious, gooey texture everyone loves.

Optional Add-Ins
While the classic combination of cookies, marshmallows, and chocolate is unbeatable, a few creative add-ins can take your cookie s’mores to the next level. Consider drizzling caramel or peanut butter for a sweet and salty twist. Crushed nuts, like pecans or almonds, add a delightful crunch, while a sprinkle of sea salt enhances the overall flavor.
When incorporating add-ins, the key is balance. A little goes a long way, so be sure not to overpower the original flavors. By experimenting with these options, you can create cookie s’mores that are uniquely yours while still honoring the timeless essence of this classic treat.
How to Make Cookie S’mores
Making cookie s’mores is not only easy but also incredibly fun! With the right preparation and a bit of creativity, you can whip up this delightful treat in no time. Follow these steps for smooth assembly, perfect toasting, and serving ideas that will leave everyone craving more.
Preparing Ingredients for the Perfect Cookie S’mores
To ensure your cookie s’mores turn out perfectly, preparation is key. Start by measuring each ingredient accurately, as this avoids any imbalance in flavors or textures. Use a kitchen scale for precision, especially if you’re working with homemade cookies.
For the cookies, whether you opt for store-bought or homemade, consistency is important. Uniform sizes make stacking and toasting much easier. Keep them crisp by storing them in an airtight container until you’re ready to use them.
When handling marshmallows, decide between jumbo or mini varieties based on your preference. To maintain their gooeyness, keep marshmallows in a sealed bag to prevent them from drying out. Lastly, select chocolate that melts easily—bars, chips, or even chopped-up chunks of your favorite brand will do. The quality of the chocolate significantly enhances the final flavor.
Assembling the Best Cookie S’mores Layers
Once your ingredients are prepped, the fun really begins! Lay out your cookie bases on a baking sheet lined with parchment paper to prevent sticking. Next, place a layer of chocolate on each cookie. Be generous but ensure the chocolate doesn’t overflow, as this makes the final assembly easier to handle.
Top the chocolate with marshmallows. For jumbo marshmallows, slice them in half to create a flatter surface, or arrange mini marshmallows in a neat single layer. You can keep your s’mores open-faced for a modern twist or stack another cookie on top for a classic sandwich-style version.
If you’re feeling adventurous, now’s the time to experiment. Drizzle caramel or peanut butter between layers for an extra burst of flavor, or sprinkle crushed nuts for added texture. You could even add a touch of cinnamon for a subtle spice that complements the chocolate and marshmallow.
Baking or Broiling
The toasting step is where your cookie s’mores truly come to life. Preheat your oven’s broiler and place the assembled s’mores on the middle rack. Broil them for 1–2 minutes, but keep a close eye—the marshmallows toast quickly, and a few seconds can mean the difference between perfectly golden and burnt.
Alternatively, if you have a kitchen torch, this is an excellent tool for achieving precise, even toasting. Move the torch in small circular motions, focusing on one marshmallow at a time. This method allows you to control the level of caramelization, from lightly toasted to deeply golden, depending on your preference.
Serving Suggestions
Once your cookie s’mores are toasted to perfection, it’s time to enjoy them! For a visually stunning presentation, arrange the s’mores on a dessert platter and serve them at a party or gathering. Alternatively, enjoy them individually as a cozy treat for yourself.
For added indulgence, pair your s’mores with a steaming cup of hot cocoa or a refreshing scoop of vanilla ice cream. If you’re entertaining, consider creating a “s’mores bar,” where guests can customize their treats with toppings like sprinkles, fruit slices, or extra chocolate drizzle.No matter how you serve them, cookie s’mores are guaranteed to impress. Their combination of gooey marshmallows, melted chocolate, and crispy cookies is an instant crowd-pleaser, perfect for any occasion.
Equipment Needed for Cookie S’mores
Creating the perfect cookie s’mores doesn’t require fancy gadgets, but having the right tools can make the process smoother and more enjoyable. With just a few simple items, you’ll be well-equipped to bake, assemble, and serve these delicious treats like a pro.
Baking Sheet and Parchment Paper
A baking sheet is essential for assembling and baking your cookie s’mores, providing a sturdy surface that evenly distributes heat. To prevent sticking and make cleanup a breeze, line the sheet with parchment paper. This ensures that any melted chocolate or marshmallow doesn’t adhere to the pan, saving you from scrubbing later.
If you don’t have parchment paper on hand, don’t worry—there are alternatives. Silicone baking mats work just as well and are reusable, making them an eco-friendly option. In a pinch, lightly greasing the baking sheet with butter or cooking spray can also do the trick, though it may slightly affect the texture of your cookies.
Broiler or Torch
For that iconic golden-brown marshmallow topping, you’ll need a heat source like an oven broiler or a kitchen torch. Using a broiler is simple and effective—just place your assembled cookie s’mores on the top rack and watch closely as the marshmallows toast. However, be cautious, as marshmallows can burn quickly under the high heat of a broiler.
A kitchen torch offers more control and precision, allowing you to toast each marshmallow individually to your preferred level of doneness. Whether you’re aiming for a light golden hue or a deeply caramelized finish, a torch lets you achieve that perfect look with ease.
Cookie Cutter (Optional)
If you want to add a decorative or uniform touch to your cookie s’mores, a cookie cutter can be a fun and creative tool. Use it to shape homemade cookies into circles, stars, or other designs that complement the s’mores theme.
Even if you’re working with store-bought cookies, you can use a cutter to trim the edges or create matching shapes, ensuring each s’more looks picture-perfect. This small detail can elevate the presentation, making your cookie s’mores just as visually stunning as they are delicious.
How to Store Cookie S’mores
Storing your cookie s’mores properly ensures they remain fresh and delicious for whenever you’re ready to enjoy them. Whether you’re keeping them for a day or planning to savor them over time, the right storage techniques can preserve their texture and flavor.
Short-Term Storage
For short-term storage, keep your cookie s’mores in an airtight container at room temperature. This method prevents them from becoming stale or losing their gooey marshmallow texture. Make sure to separate layers of cookies with parchment paper to avoid sticking.
Stored this way, your cookie s’mores will stay fresh and flavorful for up to three days. If you live in a humid area, consider adding a silica gel packet (safe for food) to the container to reduce moisture and maintain crispness.
Freezing Cookie S’mores
If you want to save your cookie s’mores for a longer time, freezing is a great option. To freeze fully assembled s’mores, first allow them to cool completely. Then, place them in a single layer on a baking sheet and freeze until firm. Once they’re frozen, transfer them to a freezer-safe container or bag.
When you’re ready to enjoy them, thaw the s’mores at room temperature or reheat them in a 300°F (150°C) oven for a few minutes to refresh the marshmallow and chocolate. This method ensures that the gooey texture and delicious flavors remain intact.
Storing Leftover Ingredients
If you have extra ingredients, storing them properly is just as important. Keep marshmallows in an airtight bag or container to prevent them from drying out and becoming hard. For long-term freshness, store marshmallows in the freezer and thaw them before use.
Chocolate should be stored in a cool, dry place, away from direct sunlight, to prevent melting or blooming (white spots caused by separated cocoa butter). Cookies, whether store-bought or homemade, are best kept in an airtight container to maintain their crunch and flavor.
By following these storage tips, your cookie s’mores and ingredients will always be ready to deliver their signature gooey, chocolatey goodness!

Cookie S’mores FAQs
Have questions about making cookie s’mores? You’re not alone! These frequently asked questions will help ensure your baking experience is seamless and your s’mores turn out perfectly every time.
Can I Use Store-Bought Cookies for the Base?
Absolutely! Using store-bought cookies is a great option if you’re short on time or just want to keep things simple. Many types of cookies, like graham crackers, chocolate chip cookies, or even sugar cookies, work beautifully as the base for cookie s’mores.
Store-bought options are pre-portioned, consistent in size, and eliminate the need for extra prep work. Plus, they’re available in a variety of flavors, so you can experiment without the hassle of baking from scratch. Whether you want convenience or versatility, store-bought cookies are a perfect solution.
How Do I Keep the Marshmallows from Burning?
Burnt marshmallows can ruin the look and taste of your s’mores, but it’s easy to avoid with a few simple tricks. When using a broiler, place the baking tray on the middle rack instead of the top to prevent direct, intense heat from scorching the marshmallows.
Keep a close eye on the marshmallows as they toast, as they can go from golden-brown to burnt in seconds. If you’re using a kitchen torch, move it in small, controlled circles to evenly toast the marshmallows without burning any one spot. Patience and attention will ensure perfectly browned marshmallows every time.
Can I Make Cookie S’mores Ahead of Time?
Yes, cookie s’mores can be prepared ahead of time, making them a great option for parties or busy schedules. To assemble in advance, stack the cookies, chocolate, and marshmallows as usual, then store them in an airtight container.
When you’re ready to serve, simply toast the marshmallows using a broiler or kitchen torch. This method keeps the marshmallows fresh and ensures they’re perfectly gooey when served. Pre-made s’mores can also be stored in the freezer for added convenience.
Are There Any Gluten-Free Options for This Recipe?
Definitely! To make cookie s’mores gluten-free, use certified gluten-free cookies as your base. Many brands offer gluten-free graham crackers, sugar cookies, or even chocolate chip cookies that work wonderfully for this recipe.
For marshmallows, check the packaging to ensure they’re labeled gluten-free, as some brands may process their products in facilities that handle gluten-containing items. With these substitutions, you can create s’mores that everyone can enjoy, regardless of dietary restrictions.
What Are Some Creative Flavor Twists?
If you’re looking to put a unique spin on your cookie s’mores, there are endless possibilities! Add fresh fruit slices, like strawberries or bananas, between the layers for a burst of natural sweetness. Drizzle caramel or peanut butter over the marshmallows before toasting for a decadent twist.
You can also sprinkle crushed nuts or sea salt on top for added texture and flavor. These small changes can transform a classic dessert into a personalized creation that’s sure to impress.
By keeping these tips and ideas in mind, you can take your cookie s’mores game to the next level while avoiding common pitfalls. Let your creativity shine and enjoy every gooey, chocolatey bite!
Conclusion and Final Thoughts
Making cookie s’mores is a delightful experience that combines simplicity, nostalgia, and pure indulgence. With just a handful of ingredients and minimal effort, you can create a treat that satisfies both your sweet tooth and your love for all things gooey and chocolatey. Whether you’re a seasoned baker or someone trying this for the first time, this recipe offers something for everyone.
What’s more, the versatility of cookie s’mores means there’s always room for creativity. Why not experiment with flavors and textures? Add a drizzle of caramel for a touch of decadence, sprinkle in some crushed nuts for extra crunch, or layer in slices of fruit for a fresh twist. Each variation opens up new possibilities, allowing you to make this recipe uniquely your own.
But what truly makes cookie s’mores a must-try for any cookie lover is their ability to bring people together. Whether you’re sharing them at a party, surprising your family, or simply enjoying them on a cozy evening, these cookies are bound to create moments of joy.
So, what are you waiting for? Grab your ingredients, unleash your creativity, and indulge in the ultimate fusion of cookies and classic s’mores. Trust us—once you’ve tasted that perfect blend of toasted marshmallow, melted chocolate, and crisp cookie, you’ll wonder why you didn’t try this sooner!

